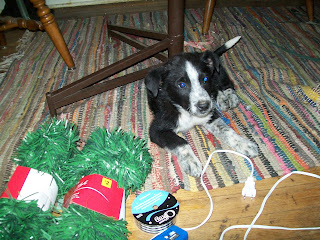
Yup you read that right! CARDBOARD WREATH!
What you're gonna need:
- A Large sturdy piece of cardboard (I used the box my new TV came in)
- 54' of Wireless Garland (I found mine at Dollar General for $2 per 18'! It worked great because it wasn't wired and therefore it was easy to wrap around my wreath)
- Glue Gun
- Ribbon
- Sharpie
- Exacto Knife
- and Scissors

Cute puppy side-kick completely optional!
First Figure out how big you want your wreath to be (and what shape, I did a rectangle about 18"x22")
Then draw it on the cardboard.
Next CUT AWAY! I tried to use my Exacto knife and it wouldn't cut through this thick of cardboard... insert scissors! The first cut wasn't that pretty I just wanted to get the biggest part out of the way so that I could focus on cutting along the line!
Next draw the center to your wreath (I wanna say I used about 12"x14")
Then I stabbed cut a huge X in the center so that the cardboard would be easier to maneuver around while I cut out the center. I know it doesn't look pretty right now, but it only has to look pretty when complete right? :-)
After I cut out the center using both scissors AND the Exacto knife it looked like this
I then attached a ribbon to use as a hanger. Then I did what I like to call the wrap and tack! Wrap the garland around the cardboard wreath (it's becoming a wreath now so I should refer to it as such!) and ever so often use a little glue to keep it in place, especially around the corners.
After you get all the way around you will have some excess. I cut off the extra and used it anywhere I still saw a bit of cardboard. When completed it looked like this!
I felt it needed a little extra so I made a bow and I knew just the place for my new wreath! Above my couch, right dab smack in the middle of the windows!
Excuse the paint that needs touch up... That IS on my list of things to do around the house! Overall I'm quite pleased with the results! I would love to see yall's take on it! Maybe add some berries or ornaments?!?!?!
Linking Up To:


What a great idea for a wreath on the cheap! And I love the rectangle shape too! Visiting from Colorado Lady today, happy VTT!
ReplyDeleteGreat idea and instructions. I am not too good at craft work, so I will just buy one.
ReplyDeleteThanks so much for sharing your tutorial with us and I love your sidekick, such a cutie!
ReplyDeleteHappy VTT,
Sally
Oh my gosh, I can do this and I love it. I have two doors that go out to my deck. Matching wreaths are perfect for those doors. I am on it.
ReplyDeleteBIG smile here.
Hugs, Jeanne
Thank you ladies for all the sweet comments! I will be there for many more VTT! Jeanne, I would love to see your take on these! Let me know when you've finished so I can see how they turn out!
ReplyDeleteThis is such a good idea! I love that it's square, and that you got the greenery for so little $$$.
ReplyDeleteThanks!
I am crazy for cardboard crafts! Thanks for sharing, it turned out great. :) P.S. Love the cute puppy too!
ReplyDeleteGreat idea-I work where I can get lots of cardboard for ideas like this~
ReplyDeleteSuper cute! I would love if you come over and link up your wreath to Sassy Sites Christmas party! :)
ReplyDeletehttp://sassysites.blogspot.com/2010/12/homemade-christmas-wreaths.html
xoxo!! Marni @ Sassy Sites!